Bins, shop layout and scanning
Locations are the shelves, bins and totes your stock sits in. Every location has a barcode, so you can label it, scan it and put stock away with a scanner or a phone. The shop layout draws your shop and numbers the shelves in the order you walk them. All of this needs Advanced Inventory (see Inventory).
Locations
Inventory → Locations lists your locations as a tree, with a count by type.
Where new products start
Each new product's inventory item gets a starting location (its home until you give it a bin). Kaniva makes one called Main Warehouse the first time. Rename it whatever you like (Shop, Garage) on its Edit page; it stays the starting place. To start new products somewhere else, open that location's Edit page and tick New products start here. The Locations list marks the one in use.
Location types
| Type | Use |
|---|---|
| Shelf | Standard storage shelf |
| Bin | A container on a shelf |
| Bulk Storage | Bulk storage area |
| Staging | Temporary staging area |
| Receiving | Incoming goods area |
| Floor, Rack, Floor area | Made by Shop layout when you generate locations |
Creating a location
- Open Inventory → Locations and click + Add Location (or + Add Child on a location, to make one inside it).
- Fill in **Location Name *** (for example "A-03-2" or "Hardware wall"), **Location Type ***, Parent Location (or None (Top Level)), Barcode (blank for an automatic code) and Zone (an optional grouping).
- Click Create Location.
Locations can sit inside each other (Warehouse → Aisle → Shelf → Bin). Renaming a location or moving it under another one updates the path of everything inside it. A location can't be moved inside one of its own sub-locations. A location that still holds items can't be deleted; move them first.
Location barcodes
Every location has a barcode, which its label prints and the Scan box looks up. Leave Barcode blank and Kaniva gives the location the next automatic code (LOC-000001, LOC-000002…), or type your own, such as A-03-2. Codes are unique in your store (capital and small letters count as the same), up to 40 plain characters, and can't start with another kind of code (PO-, WO-, KC-, ORD-, TRF-, ITM-). Editing a location with Barcode left blank keeps its code, since it may already be printed; if you change a code, reprint that label.
A location's page
A location's page shows its details, the items in it with their stock, and the locations inside it. From there:
- Print bin label and Print bin labels for all inside (see Bin labels).
- Scan stock into this location opens the Scan page with this bin already chosen.
- Scan bins onto this opens Place bins on shelves with this shelf already chosen.
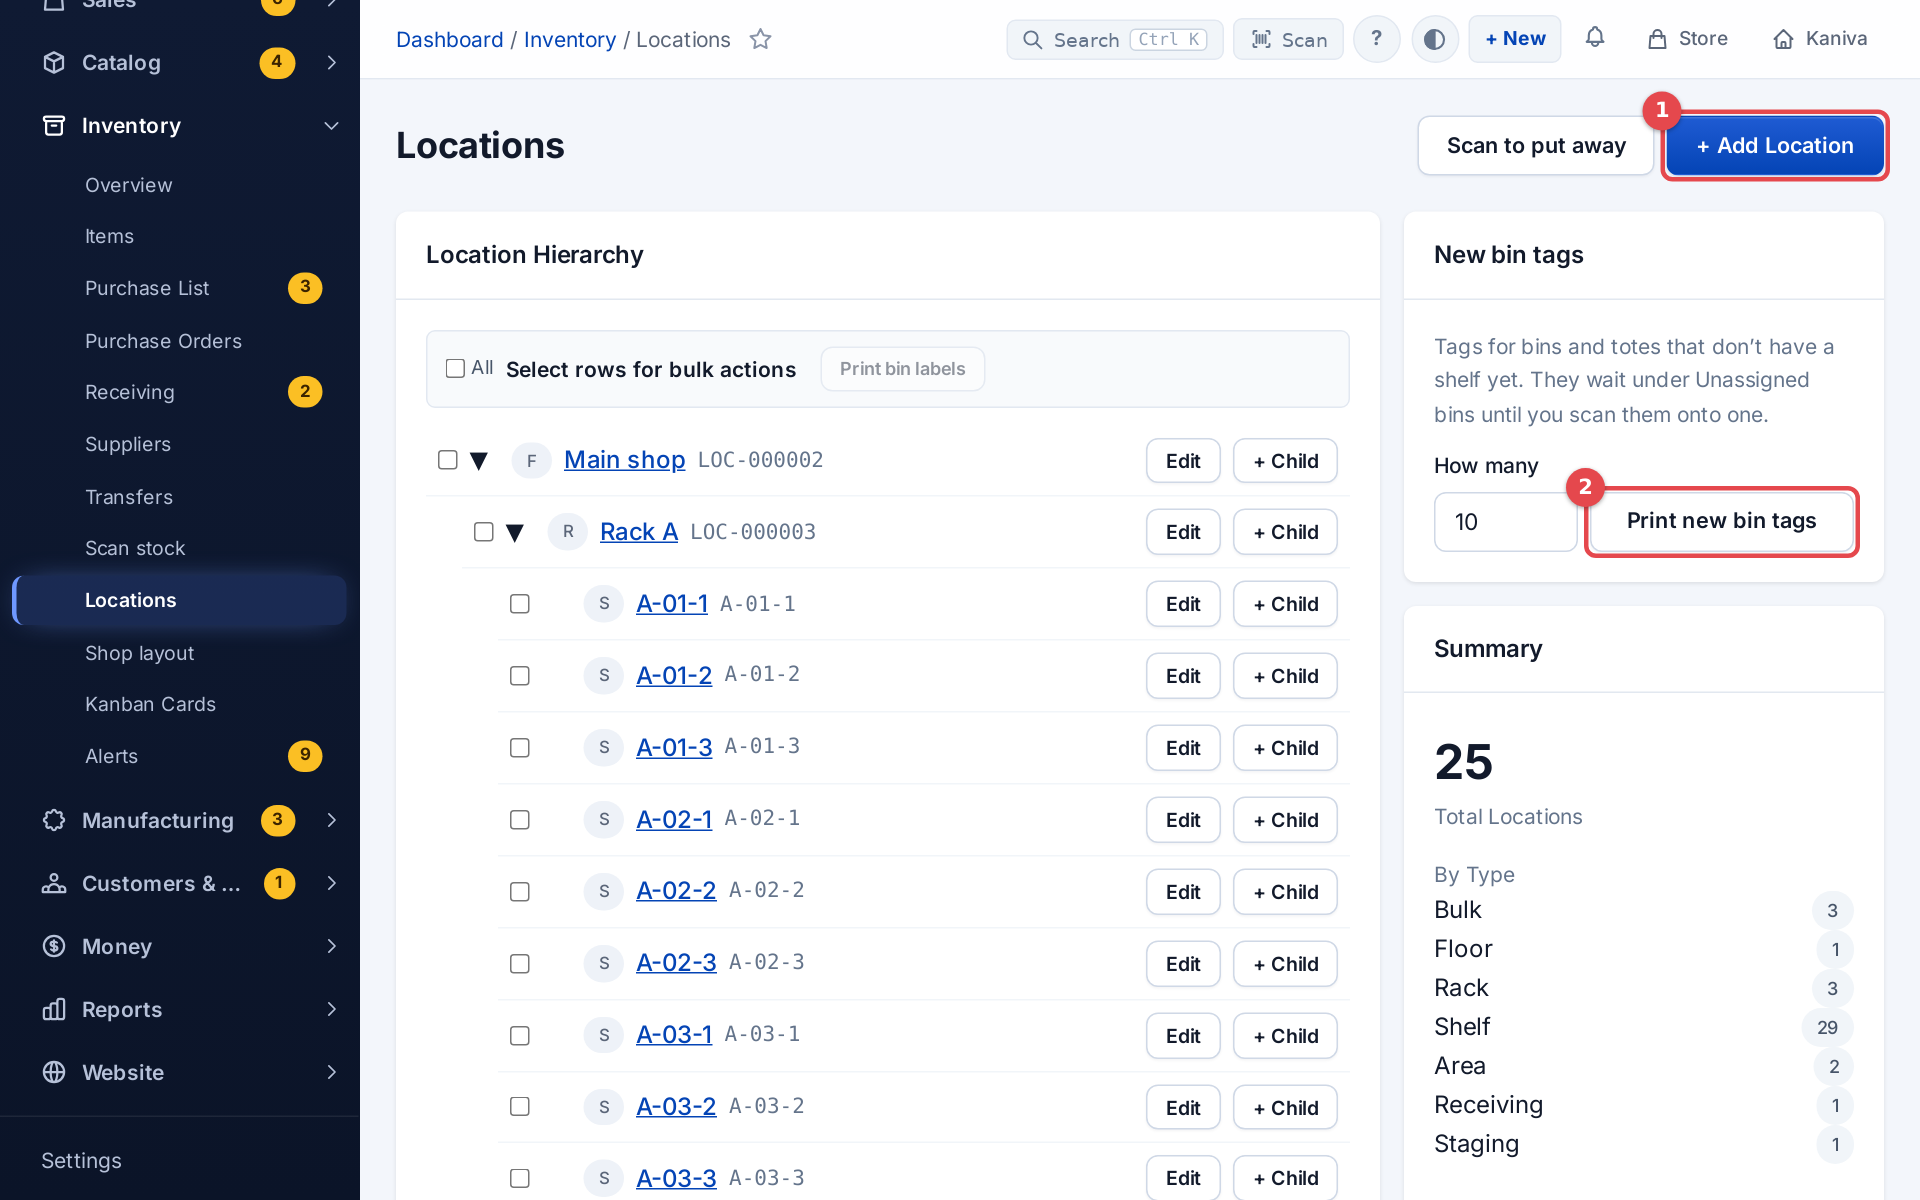 The Locations list with New bin tags
Bin labels
Print 3" × 1.5" labels to stick on bins and shelves:
- One location: open it and click Print bin label.
- A location and everything inside it: Print bin labels for all inside on the location's page.
- Any mix: tick locations on the Locations list (or All) and choose Print bin labels.
New bin tags (on the Locations list) makes tags for bins and totes that don't have a shelf yet: enter How many (1 to 200) and press Print new bin tags. Kaniva makes that many bins, each named after its own code (LOC-000231…), keeps them under a location called Unassigned bins, and opens the label page for exactly those, where you choose the label size (3 × 1.5 in, NIIMBOT 50 × 30 mm and so on). Stick a tag on each tote, then place it on its shelf; it leaves Unassigned bins when you do. The tags don't print "Unassigned bins", so they stay right after the bin moves.
The Bin layout prints the location's name in big letters (readable from across the shop), a QR code of its code beside the name (a phone camera reads it at a glance when picking on a phone), its barcode, and the path above it in small type (for example "Main Warehouse > Aisle A"). Shelf fits longer names. The code is printed under the barcode when it's different from the name. Print from the browser, Download PDF, Send to printer with PrintNode, or a NIIMBOT printer, as with product labels.
Kanban cards print on the same label page, drawn the same way: the item's name big, the card's QR code and a barcode of its card number.
Shop layout
Inventory → Shop layout is a drawing of your shop that numbers every shelf in the order you walk it, so labels go up in order and picking can follow the same path.
Drawing the shop
- Each floor is a tab. Set its name, floor number and size in feet in the panel next to the plan (with nothing selected), or drag the dot at the floor's bottom-right corner. + Add floor adds the next floor up.
- Pick a tool (Rack, Shelving, Floor area, Bench, Wall, Door, Stairs) and drag on the floor to draw it, or tap for a standard size. Everything snaps to the grid.
- Tap something to select it: drag to move it, drag its corner dot to resize, Rotate turns it a quarter turn, Copy places another one beside it. Arrow keys nudge it; Undo (or Ctrl+Z) steps back.
- For a rack or shelving unit, set Bays (sections along its length) and Shelves (levels, counted from the floor up). Each rack can be different. The thick blue edge is the side you pick from: change it with Picked from, or tick Double-sided when it's picked from both sides.
- When the bays of one rack don't all have the same number of shelves (a bay with a tall bottom shelf for tyres, say), tick Different per bay and type the shelves for each bay. The boxes run Bay 01, Bay 02… in the order the codes number them, and the hint under them says which end Bay 01 is (it's fixed the first time you generate). On the plan, each bay shows its count. Both sides of a double-sided rack share the counts.
- Walk start marks where every walk on the floor begins: the door or packing bench you leave from. For a floor above, draw its Stairs and set Goes to to the floor below; the walk upstairs starts at the stairs.
- Packing / shipping: select the bench or floor area where orders are packed and tick Packing / shipping (one per store; ticking another moves it). It's tagged Packing on the plan, and pick lists will end there. If the floor has no walk start yet, ticking it puts the walk start beside it.
The drawing saves itself as you go ("All changes saved" above the plan). On a phone the plan is view only; draw on a tablet or computer.
Zoom and pan. Use +, − and Fit in the corner of the plan, pinch with two fingers, or hold Ctrl (⌘ on a Mac) and scroll to zoom in where you point. Drag an empty part of the plan to move around (Space + drag or the middle mouse button work too); when zoomed in, plain scrolling moves the plan. + / − zoom and 0 shows the whole floor again. Each floor remembers its own zoom while the page is open. Zoom and pan work on a phone too.
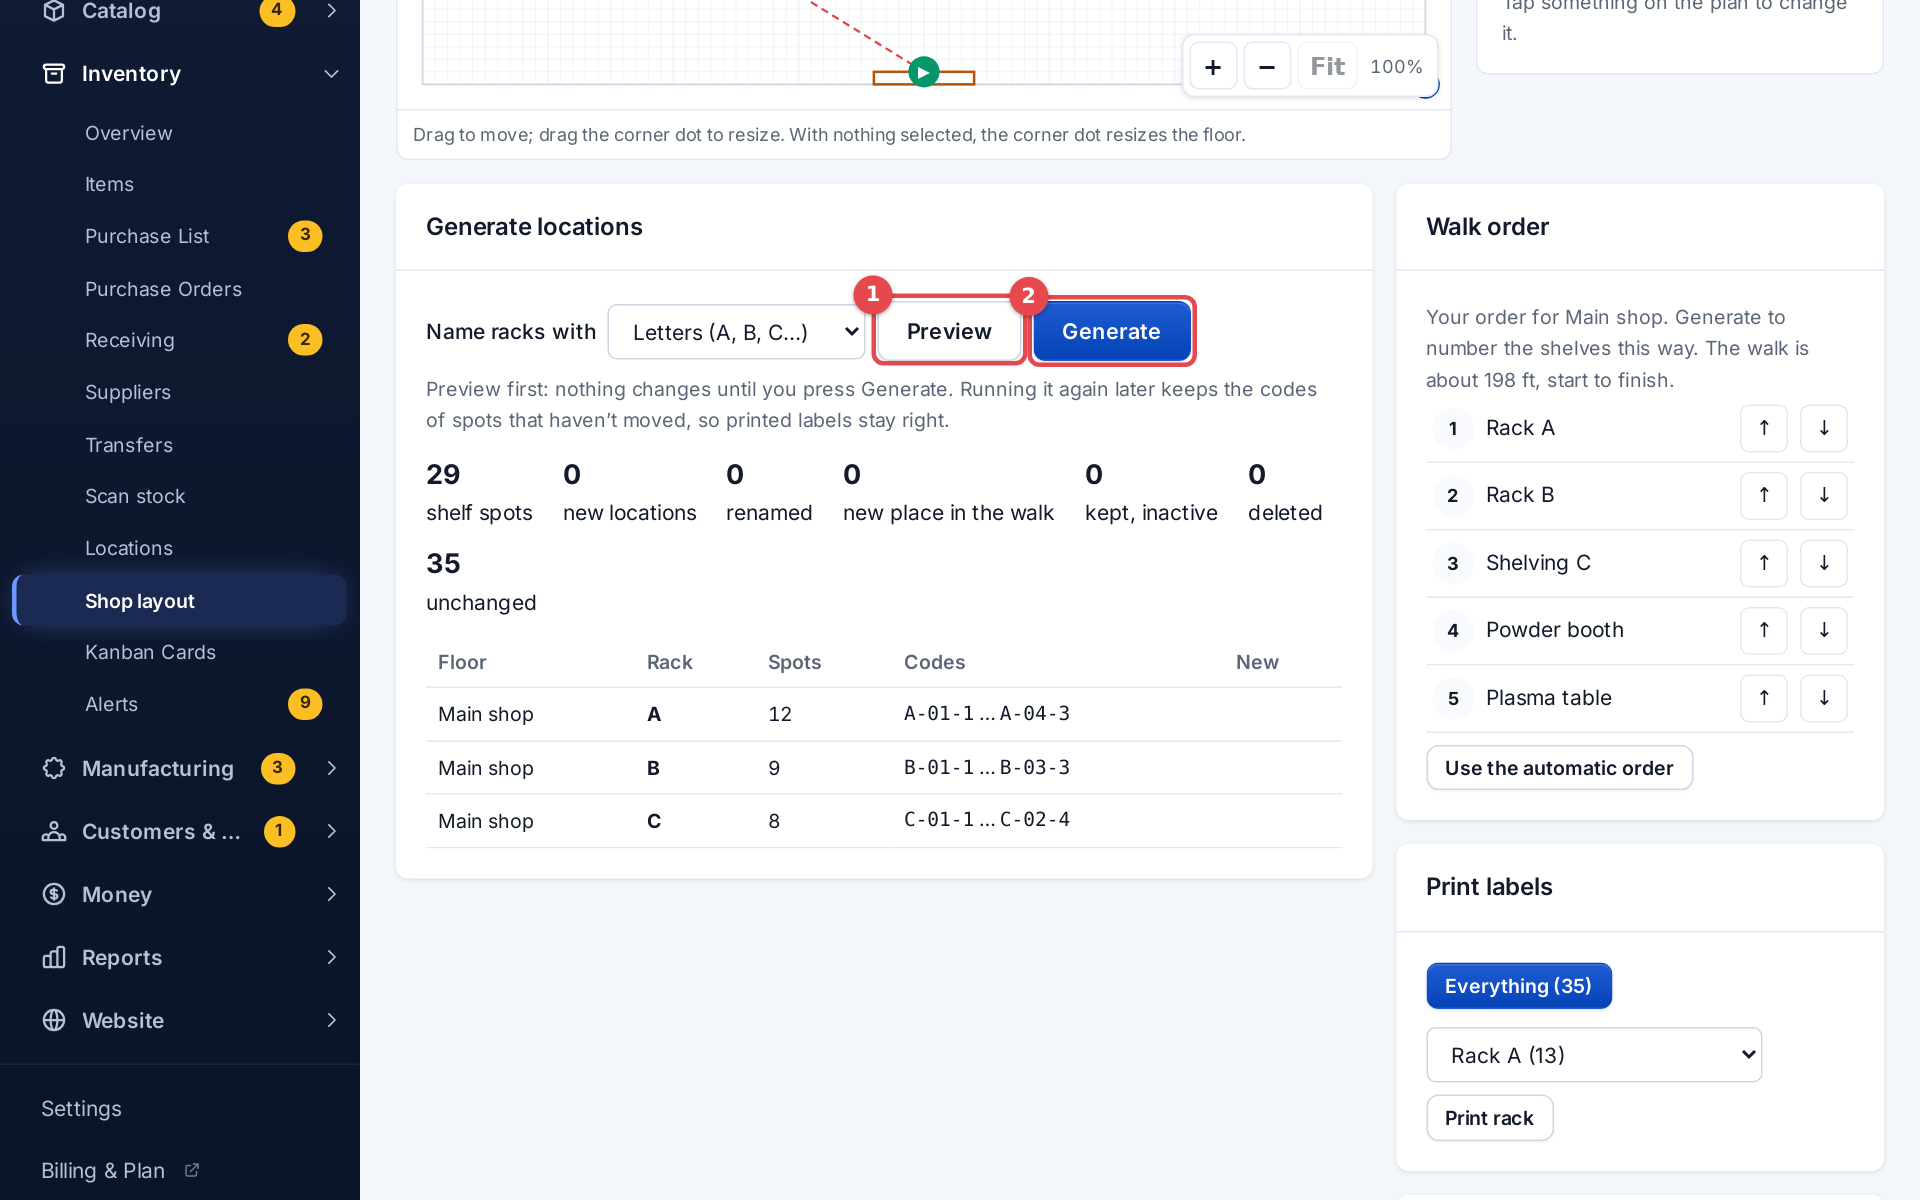 The shop layout with racks and the walk drawn over them
Buildings that aren't rectangles
The floor is a rectangle to start with. For an L-shaped building, a cut corner or angled walls, use Building outline:
- Tap each outside corner of the building in turn. Corners snap to the grid; walls between them can run at any angle.
- Tap the first corner again (or double-click, press Enter, or Done) to close it. Everything outside is shaded and hatched.
- To change it later, pick Building outline again: drag a corner to move it, drag the small dot halfway along a wall to add a corner, or select a corner and press Delete to remove it. Clear outline goes back to the plain rectangle.
Walls can't cross each other. Use the Wall tool for walls inside the building. If a rack or floor area sits outside the outline, Preview says so, but you can still generate.
Generating locations
- Choose whether racks are named with Letters (A, B, C… without I and O, which look like 1 and 0) or Numbers (1, 2, 3…). A label typed on a rack is kept; blank ones get the next free letter or number in walk order.
- Press Preview. The walk is drawn over the plan (a dashed line and each rack's place), and the table lists every rack with its codes and what will be created, renamed, deleted or kept. Nothing changes yet.
- Press Generate to create the locations: one per floor, one per rack, and one per shelf spot under it.
Shelf-spot codes are rack-bay-level: A-03-2 is rack A, bay 03, level 2 from the floor. A bay with fewer shelves just has fewer codes (with shelves 5, 5, 4, 3, bay 04 stops at A-04-3). Floors above the first start with their number (2A-03-2; 2-1-03-2 with numbered racks), so floor-1 labels never change when you add a floor. The code is also the barcode.
The walk: from the walk start, Kaniva goes to the nearest end of the nearest aisle, walks it to the far end, then takes the next nearest aisle, so parallel aisles are walked back and forth. "Nearest" is by walking: the route goes around racks, floor areas, benches and walls, through doors, and never outside the building outline, so a rack behind a wall isn't treated as close. The dashed line on the plan is that route, each number sits where you stand for that rack or area, and the walk ends at the packing spot (or at the stairs up, on a floor below). The order is planned for the shortest total walk from the walk start to the finish, not just the nearest next rack, so it doesn't zig-zag or double back; the walk-order card shows how far it is. If something can't be reached on foot (walled in with no door), or a rack side has no room to stand in front of it (against a wall or another rack), the preview says so: make that rack single-sided if nobody picks from that side. Racks facing each other across an aisle are picked together as you go. Each bay is one stop (levels bottom up), and floors are walked in order, going up the stairs last. To set your own order, drag the racks in Walk order (or use the arrows); Use the automatic order goes back.
Double-sided racks are two racks to pick from, one per side, each with its own letter (for example C on the top or left side and D on the bottom or right). Their bays are numbered the same way, so C-03-2 and D-03-2 are back to back. Bay 01 is the end the walk reaches first when you first generate, and stays there afterwards.
Generating again after changing the drawing is safe: spots that still exist keep their codes (printed labels stay right), new spots get codes, and spots you removed are deleted if they're empty. A removed spot that still holds stock, is an item's home bin, or has a bin inside it is kept but made inactive and listed, so you can move what's there first. Renaming a rack renames its spots: the preview lists them so you can reprint. Lowering the shelves in one bay only removes that bay's top spots; the rest keep their codes.
Pick lists follow this walk; see Picking in walking order. So does Print Batch for kanban cards, which can also print one rack or area at a time (see Printing cards).
Zones: work centers and build stages
A floor area or bench can stand for a work center (the same names your work orders and BOM operations use, like CNC Router or Welding) and an order build stage. Select it and fill in Work center and Build stage; the zone shows them on the plan under its name. A floor area tied to a work center is that work center's work zone: Kaniva watches for each work order's parts to arrive there (see Work zones). Benches can't hold parts, so use a floor area for a work zone.
Printing the shelf labels
After Generate, Print labels prints everything, one floor, or one rack, in walk order, on the usual bin label page. A sheet holds up to 200 labels, so a big shop prints a floor or a rack at a time.
Sharing a layout with another store
Two stores in one building (two brands, say) can share one drawing, so the shelf codes and the labels on the racks are the same in both. Stock, parts, bins, carts, orders and picking settings stay each store's own.
- In the store that should follow, open Inventory → Shop layout, and under Shared layout pick the other store in Use the layout from, then Link. You need to be an owner or admin of both stores, and both need Advanced Inventory.
- The drawing is copied and this store's shelf spots are generated from it straight away. If one of this store's own locations already uses a shelf code (an old bin called
A-01-1, say), nothing changes and the card says which code clashes; rename that location and press Sync now. - From then on you edit the layout in the source store. When it presses Generate, the stores following it update a minute later. In a following store the drawing is view only.
- Shelves holding stock in the following store are kept (inactive) if the source removes them, until you move the stock.
- Make this store the source turns the link around: the other store follows this one, and you edit here.
- Unlink (or Stop sharing in the source) ends the link from either side. Each store keeps its own full copy of the layout, its locations and its labels, and can edit it on its own. Selling one of the stores doesn't affect the other.
Scanning
Every barcode Kaniva prints can be scanned back: bin labels, item and product labels, kanban cards, packing slips, purchase orders, work orders and jobs, transfers, order numbers, and the tote cards printed with pick lists. So can the maker's UPC/EAN on a product's packaging, once it's saved on the product or variant (see Product Identifiers); part numbers and variant SKUs are matched first.
The Scan box
The Scan button sits beside Search at the top of every admin page. Type or scan a code and press Find, or tap Use camera to read a barcode or QR code with a phone or tablet camera. One match opens straight away; if two things share a code (an order number that is also a part number, say) you pick which one. Without Advanced Inventory the Scan box finds orders, packing slips and products. If nothing in this store has the code but one of your other stores does (stores sharing a warehouse, say), it says where, for example Nothing for “TOTE-05” in this store. It’s in Up North Supply Co., with a link to open it there. It looks only in stores you work in, for bins, parts, products and packing-slip boxes. The Shipping Station's scan box takes a packing slip's QR code as well as its barcode.
Purchase orders that can still be received (submitted, sent or partial, not drop-ship) open Receive Items directly; any other PO opens its page.
Tote cards (PACK- and the order number, printed with a pick list) open the packing screen for that order.
Barcode scanners
Any USB or Bluetooth barcode scanner that reads Code 128 (and UPC/EAN, for makers' barcodes; most have both on out of the box) and works as a keyboard (the usual "keyboard wedge" mode, sending Enter after each scan) works with Kaniva; no driver or setup. Scan on any admin page and what you scanned opens, without clicking into a box first. While you're typing in a form field, scans go into the field as normal. The shipping station, the POS register and the floor kiosk keep their own scanning.
Putting stock away (the Scan page)
Inventory → Scan stock (also Scan to put away on the Locations list, or Scan stock into this location on a location) opens the Scan page, made for setting up a shop or receiving stock:
- Make sure Put away stock is chosen at the top.
- Scan a bin label. It becomes the current bin, shown big at the top.
- Scan a part (item or product label, SKU, supplier part number). Kaniva shows how many are in this bin and where else it is.
- Use the buttons:
- Add here: adds the quantity (default 1; use + and − or type a number, negative to take some away). The quantity goes back to 1 for each new part. The quantity box is selected as soon as the part shows, so on a handheld with a keypad you can key the count and press Enter to add it, or just scan the next part: a count you keyed but didn't add yet is added first.
- Count: type how many are really in this bin and Save count; the bin is set to that and the difference is booked as a count (a count that matches is recorded too). A short count while open orders want the part first asks whether the missing ones were already pulled for those orders: Yes records them as picked (moved to Packing), No books them as missing. See Fixing the count.
- Make this its home bin: makes the current bin the item's home bin.
- Move all N here from …: moves everything from another bin into this one.
- Put the N not in a bin here: stock counted before you had bins (in the item's total but in no bin) goes into this bin; the total doesn't change. A Count uses that stock first too, so it isn't counted twice.
- Scan the next part, or another bin label to switch bins. Scanning anything else (an order, a PO, a packing slip) opens it.
The item's total, the stock in each bin and the linked product's stock change together, and every change is in the item's stock movements (marked "Scan: …"). A double tap only counts once, and Kaniva won't take a bin below zero. A product that isn't in inventory yet offers the New Item form for it.

Placing bins on shelves
The switch at the top of the Scan page has two modes: Put away stock (above) and Place bins on shelves, for putting tagged bins and totes on the shelves of your shop layout (or on any location).
- Choose Place bins on shelves.
- Scan a shelf label (for example
A-03-2). It shows at the top as "Placing on A-03-2 · Rack A, bay 3, shelf 2". - Scan each bin or tote label that sits on that shelf. Each one goes inside the shelf: its path becomes "Main floor > Rack A > A-03-2 > LOC-000231" (and so does everything inside it), and it takes the shelf's place in the walk order, so picking goes there in the right order.
- Placed here lists what you put on this shelf. Undo puts one back where it was.
- Scan the next shelf label to move on: shelf spots from the shop layout always switch the shelf instead of being placed. To place onto a bin or a location that isn't a shelf spot, tap Change shelf first, then scan it.
Kaniva won't put a floor, rack or shelf spot from the shop layout inside anything, won't put bins on a whole floor or rack (scan one of its shelf spots), and won't put a bin inside something that's inside it. Scanning a part in this mode reminds you to switch to Put away stock. The mode and shelf are remembered in that browser tab. A location's page has Scan bins onto this, which opens this mode with that shelf already chosen, and lists the bins on it.
