Getting Started
Creating your store
- On kaniva.io, click Start free trial, or pick Build to order, Products I ship or Digital downloads under What do you sell first?
- Sign up with your email, or log in if you already have an account.
- Enter your Store Name and answer What will you sell first? (Build to order, Products I ship, Digital downloads or A mix). If you picked one on the homepage, it is already selected. Click Create My Store.
- You land on Setup, which walks you through what a store needs before its first order. The Set up your store guide goes through it step by step.
Your answer to What will you sell first? pre-answers two questions in Setup's first step (How do you sell? and How do orders reach customers?). You can change both there, and you can sell all three kinds of product later.
The trial is 30 days. You choose Pay As You Go, Solo or Shop later, from Billing & Plan at the bottom of the sidebar; every plan includes every module.
Your store's address
- Storefront:
https://kaniva.io/app/your-store. The last part is made from your store name. - Admin: add
/admin/dashboard, for examplehttps://kaniva.io/app/your-store/admin/dashboard. - Your own domain: once it is set up, the store is at
https://yourdomain.comand the admin athttps://yourdomain.com/admin/dashboard. See Custom Domain.
Setup
Home → Setup is the go-live checklist. It has five counted steps (four for a store that only sells downloads, which has no shipping step):
- Your shop: store name, contact email, what you make, how you sell, typical price and how orders reach customers.
- Accept payments: Connect with Stripe, or your own Stripe or PayPal keys under Advanced: Stripe or PayPal API keys.
- Ship orders: your ship-from address, then Shippo live rates or Use fallback rates.
- First product: what it asks for depends on your store. A build-to-order store sees First custom product, a digital store First download.
- Preview: open the storefront the way a customer sees it.
A Finishing touches screen (logo, the feel of the site, lead time, where you sell today) comes after step 1. It is optional and not counted. Later: integrations and API keys at the bottom of Setup holds PrintNode, Google Maps, the Stripe webhook secret and, with CRM, the call and ticket-triage keys. None of these are needed for the first order. Only the owner and admins can save payment keys, shipping or these integration keys; staff see the steps with a note instead.
Any step except the first can be skipped with Skip for now. Setup comes back to skipped steps after the preview, and is not finished until they are done.
When every step is done, Setup leaves the sidebar. You can still open it from the dashboard (Review setup). Hide from menu at the bottom of Setup removes it sooner; to show it again, tick Show Setup in the menu in Settings → General.
Finding your way around the admin
- The sidebar is grouped: Home, Sales, Catalog, Inventory, Manufacturing, Customers & CRM, Money, Reports and Website. Some groups only appear when that module is on. Click a group's name to open its overview page: a card for each page in the group, with a live number (for example Orders shows how many are waiting to ship, Reviews how many need approval) and what the page is for. Click the arrow beside the name to open or close the group without leaving the page. The group you are in always opens, and the others stay the way you left them. Numbers on the overview pages refresh every minute.
- Home is the overview to start the day on. It opens with Needs attention: a card for every page with something waiting on you (orders to ship, reviews to approve, deliveries due, open tickets, overdue tasks and so on), each saying how many and opening that list filtered to exactly those records. When nothing is waiting it says so. The number on Home in the sidebar is the total, so you can see from any page whether there is something to do. Below it, Jump to has the Dashboard, Setup (until your store is ready to sell) and the Calendar.
- Favorites: click the star next to the page name at the top of any page in the sidebar or in Settings to pin it to Favorites at the top of the sidebar. Click it again to unpin it. Favorites stay in the order you added them and belong to you alone; other staff don't see them. A page you can no longer open (a module was turned off, or your role changed) drops out of the list.
- Settings at the bottom of the sidebar opens one page with a card for every setting. Each settings page has the same tabs across the top, so you can move between them.
- Search (top bar, or
Ctrl+K/⌘K) finds pages, orders by either order number, by customer name or email, or by what was ordered (type a product name such as "battery" to list the orders that contain it), products by name or SKU, customers, contacts by phone, purchase orders and work orders. - + New in the top bar starts a product, a phone order and, when those modules are on, an expense, a work order or a contact.
- The ? in the top bar opens the part of this manual for the page you are on. The manual has a search box at the top of its contents list.
- Revenue figures are labeled Gross (incl. tax + shipping) or Net sales (excl. tax + shipping). Hover over the label for what it includes.
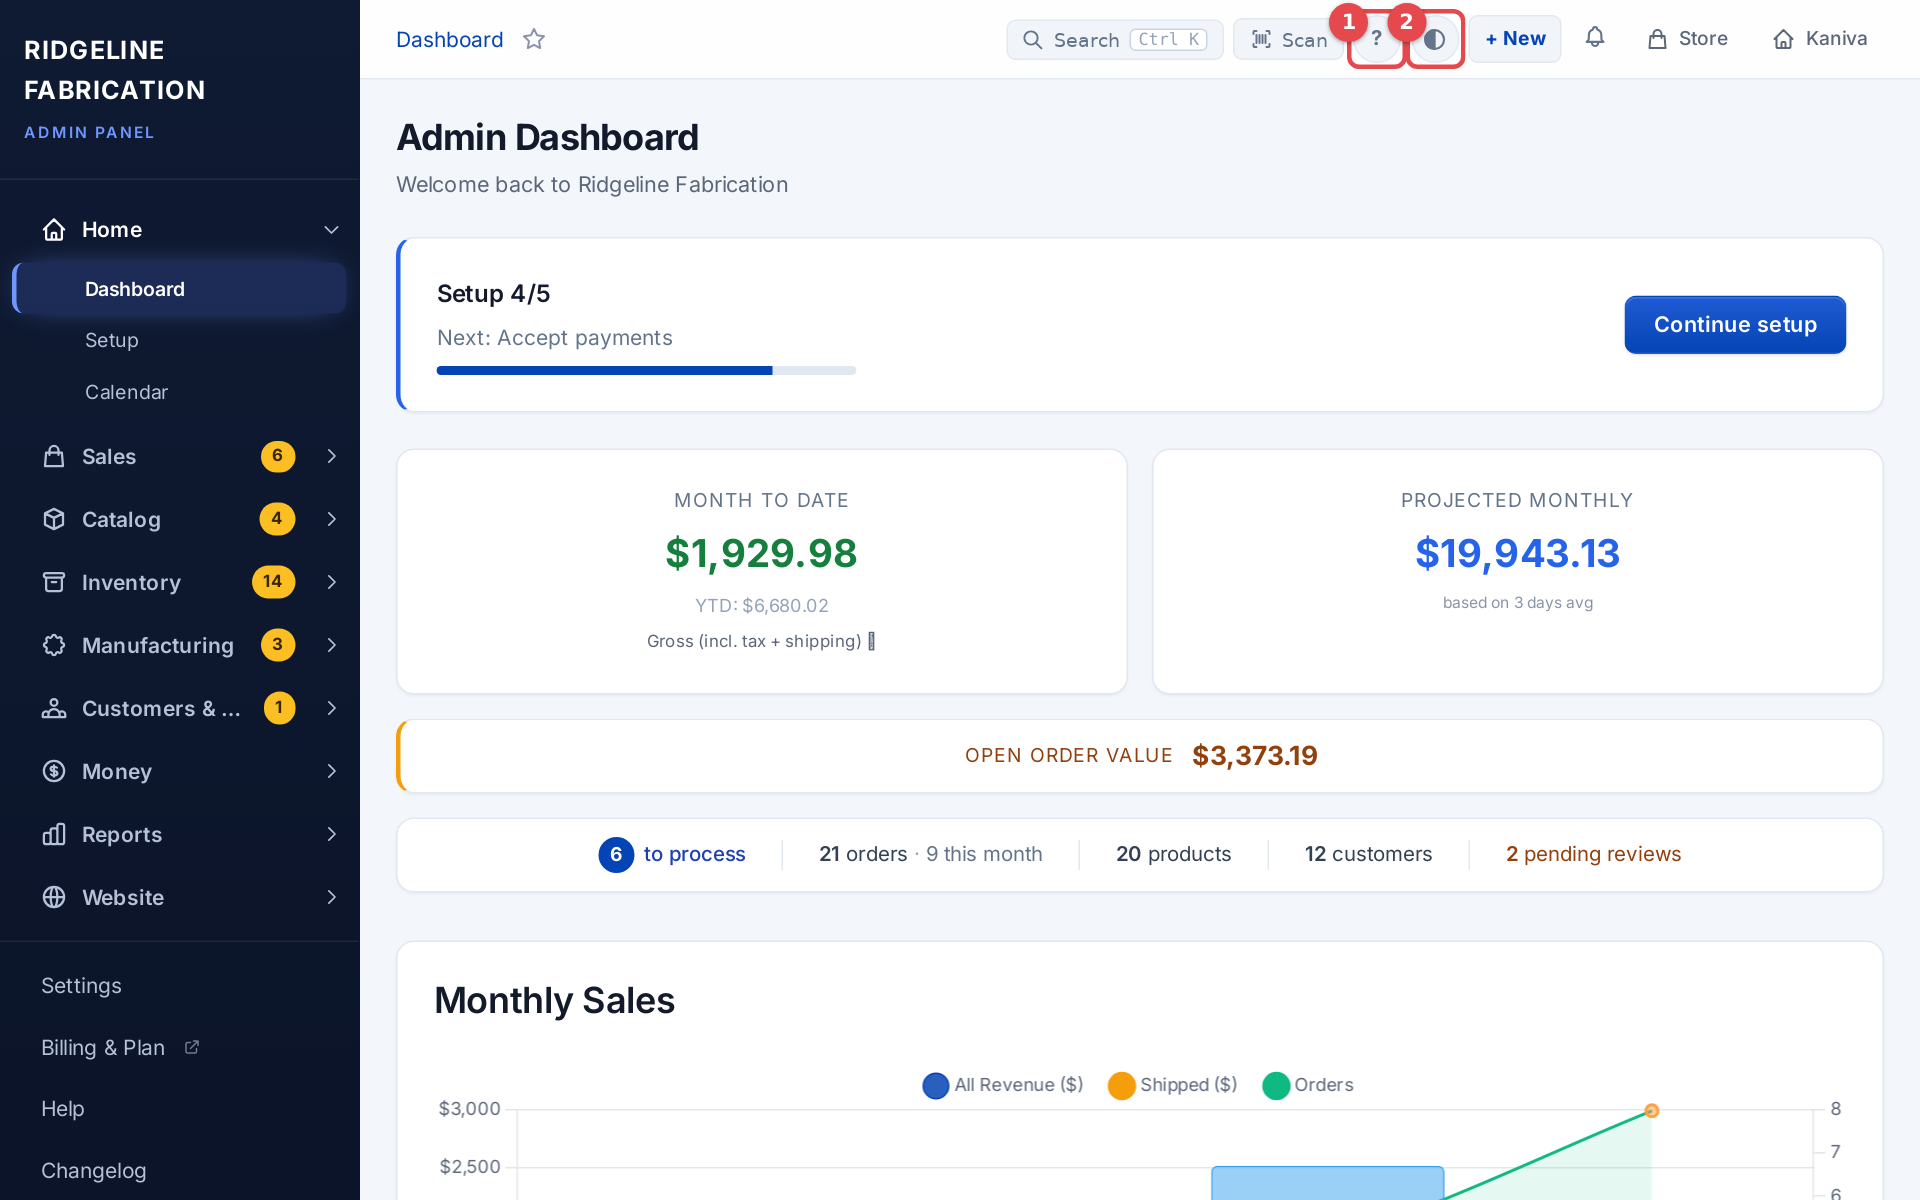 The sidebar, the top bar and the Help button
Appearance: light and dark
The Appearance button in the top bar (the half-filled circle, next to ?) sets how the admin looks for you:
- Color: Graphite (the default: quiet greys with a light sidebar), Kaniva Blue (a navy sidebar) or Workshop Green.
- Mode: Light (the default) or Dark always use that look. Auto matches your computer or phone, so the admin is dark when your device is in dark mode.
Every color works in both light and dark, and status colors (paid, pending, overdue) mean the same in all of them. Your choices are saved for you only, so other people on your team keep their own. Printed pages, packing slips, invoices and PDFs are always light.
The admin bar on your storefront
When you are signed in as the store's owner or an admin and look at your own storefront, a slim dark bar sits along the bottom of the screen. Customers never see it.
- Edit product, Edit post, Edit page, Edit category or Edit homepage opens the admin screen that edits what you are looking at. It only shows on pages that have something to edit.
- Admin opens the dashboard.
- Hide folds the bar into a small pencil tab in the bottom-left corner. Click the tab to bring the bar back. The choice is remembered in that browser.
The bar works on every theme. Your page, the sticky cart bar and the chat bubble move up so nothing sits under it, and it doesn't print.
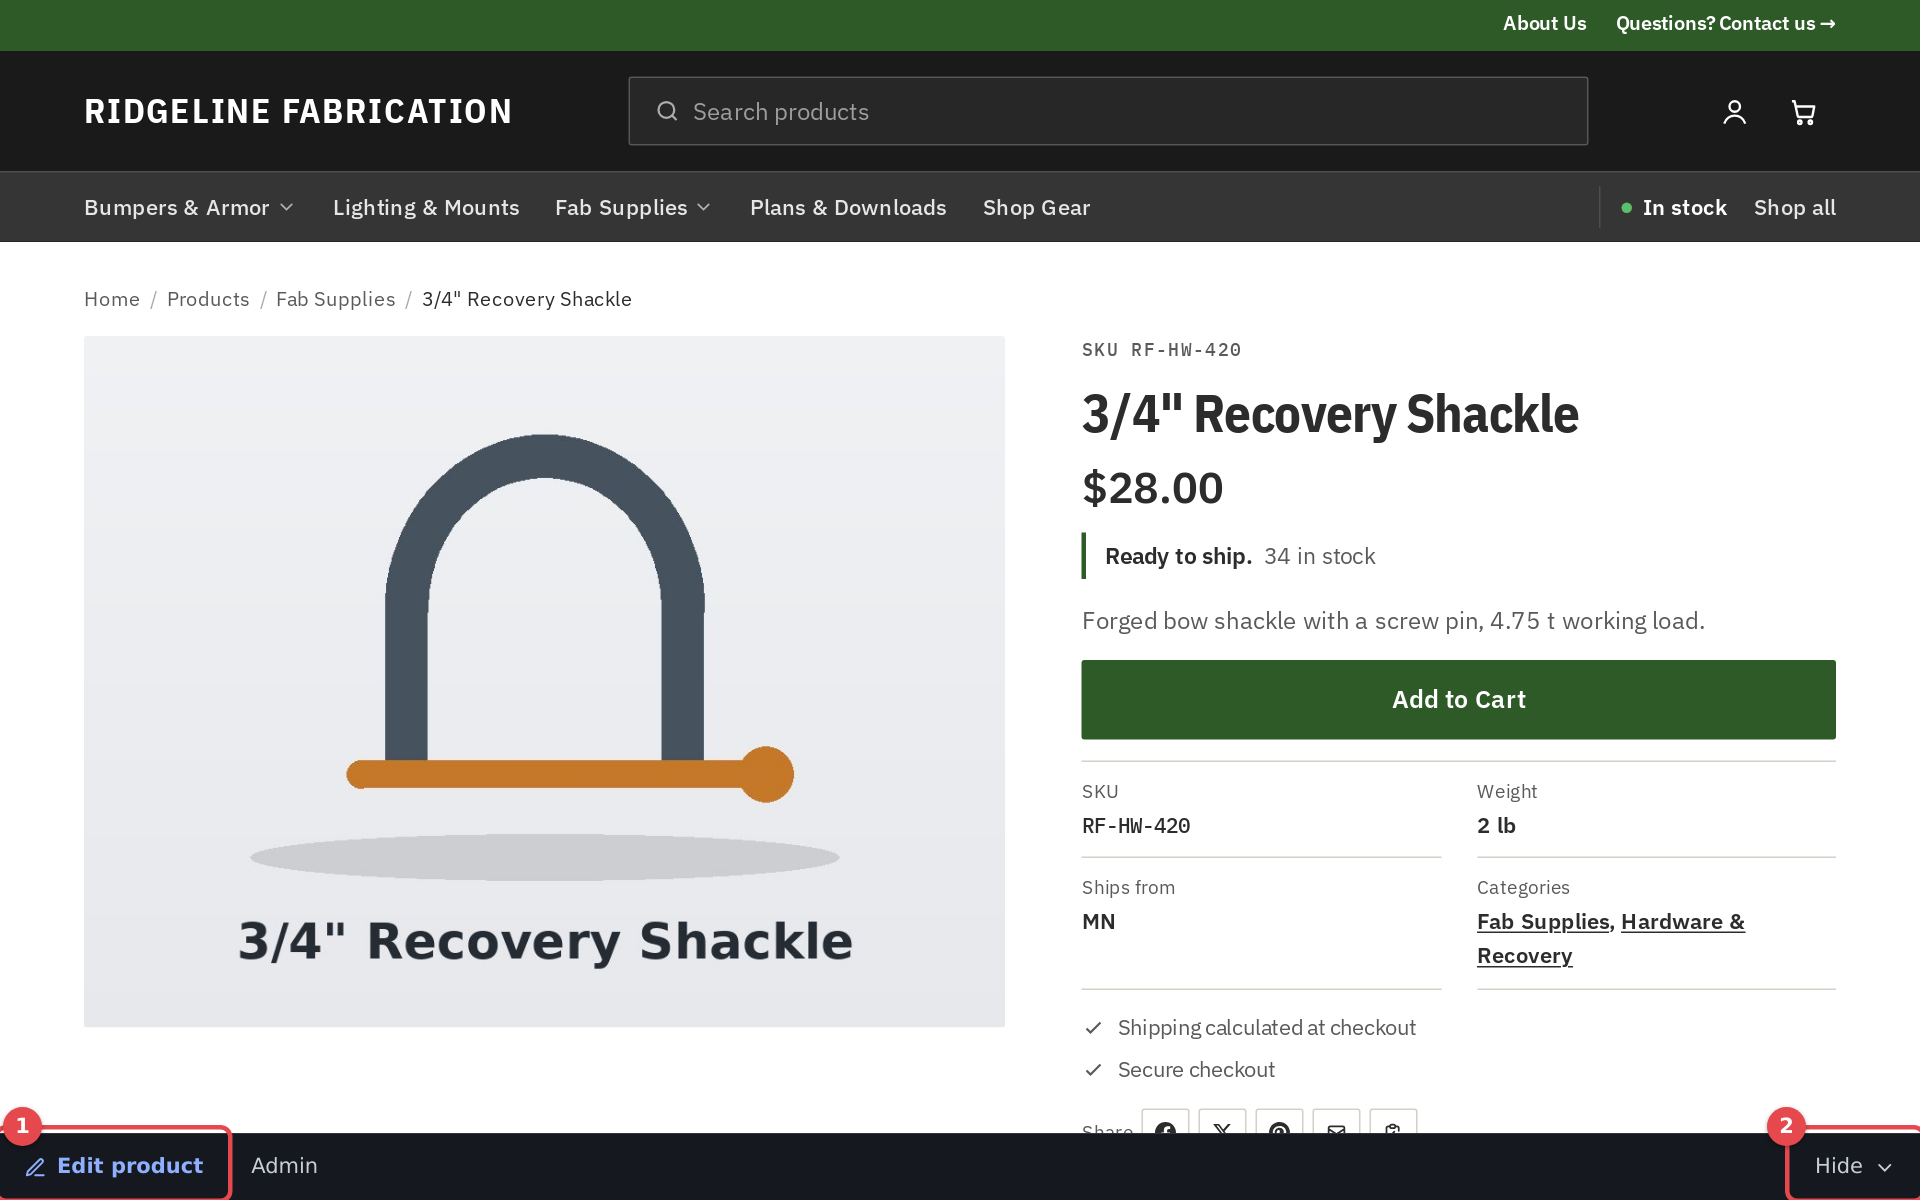 The admin bar at the bottom of a product page