Custom Domain Setup
Use your own domain (like shop.yourcompany.com) for your store. Your kaniva.io address keeps working alongside it.
Your kaniva.io address
The Store address box at the top of Settings → Domain is your store's address on Kaniva (kaniva.io/app/your-address). The store owner can change it: lowercase letters, numbers and hyphens, 3 to 40 of them. The old address keeps working: links, printed packing slips, bookmarks and anything else that used it are sent to the new one, and no other store can take it. Reopen the admin app on phones and handhelds from the new address.
Before you start
- A domain you own
- Access to its DNS settings (at your registrar, or Cloudflare)
1. Add a DNS record
Pick the option that fits your domain. The Domain page in Settings shows the same instructions with the exact values.
Option 1: Subdomain (recommended)
For an address like shop.yourcompany.com, add a CNAME record:
| Type | Name | Target |
|---|---|---|
| CNAME | shop (or your subdomain) |
stores.kaniva.io |
Option 2: Root domain (A record)
For an address like yourstore.com, add an A record. Root domains can't use a CNAME record.
| Type | Name | Value |
|---|---|---|
| A | @ |
94.72.162.214 |
| CNAME | www |
stores.kaniva.io |
The www record makes www.yourstore.com work too: it gets its own certificate and sends visitors to yourstore.com (or the other way round, if you entered the www address).
Check the value against the one shown on the Domain page before you save it.
Option 3: Root domain with Cloudflare
- Add your domain to Cloudflare (the free plan works)
- Add a CNAME record for
@pointing tostores.kaniva.io, and one forwwwpointing tostores.kaniva.io - Set both to DNS only (grey cloud): Verify has to see this server's address, and the certificate is issued here
- Cloudflare "flattens" the
@record to an A record automatically
DNS changes can take a while to spread across the internet.
2. Enter the domain in Kaniva
- Go to Settings → Domain
- Under Configure Custom Domain, enter your domain (for example
shop.yourcompany.com) - Click Save Domain
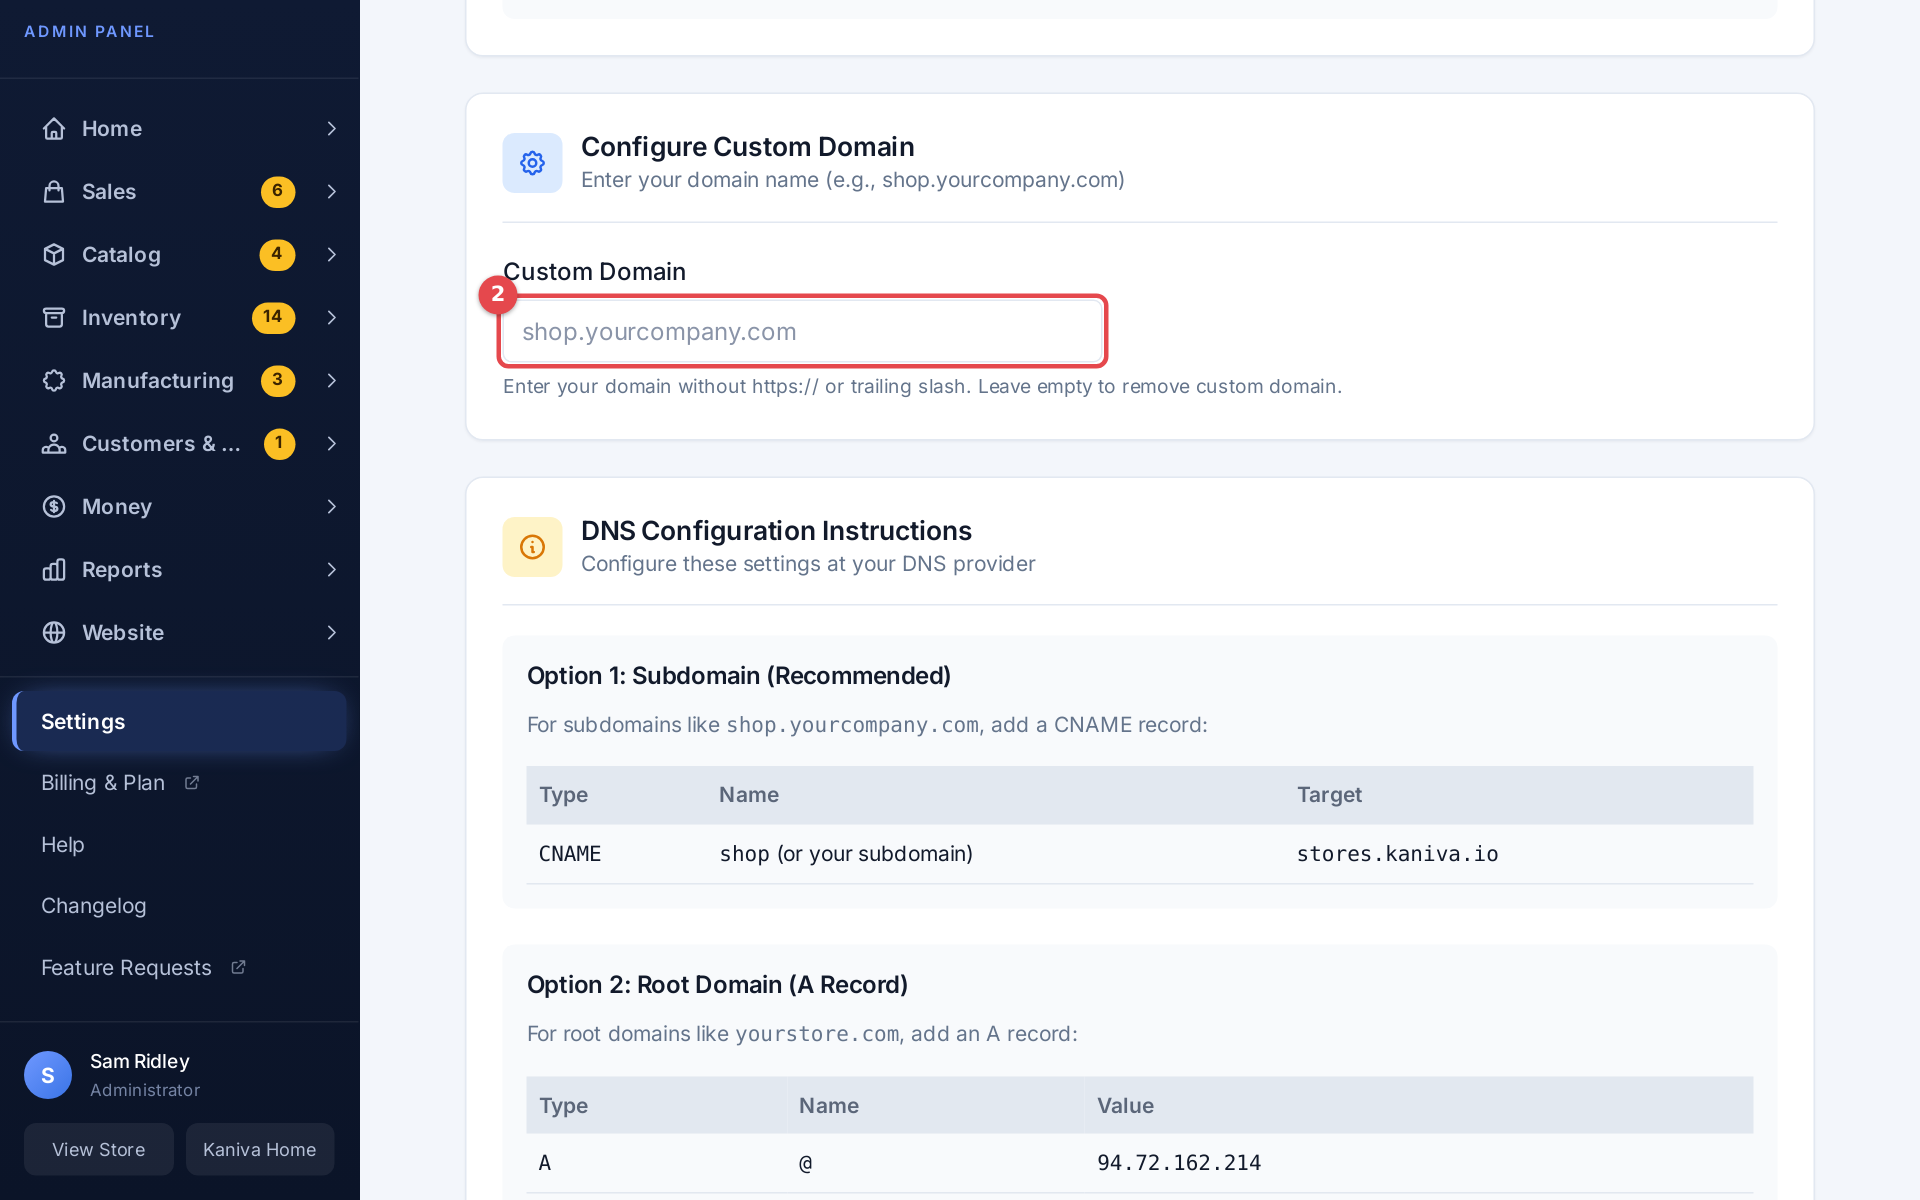 The Domain settings page
3. Verify and get SSL
Click Verify DNS. Kaniva checks your record:
- ✓ DNS Configured! means the record is right. Kaniva then issues a free SSL certificate (Let's Encrypt) for your domain by itself. While that runs you see Provisioning SSL...; refresh the page after a minute
- DNS Not Configured means the record isn't visible yet. Check the tip shown, wait a little, and try again
Under Current Domain Status, your domain shows PENDING DNS until it's ready and SSL ACTIVE once it is. After that the button reads Check Status.
Remove a custom domain
On Settings → Domain, click Remove Domain and confirm. Your store stays on its kaniva.io address, which always works.